Video surveillance technology has advanced rapidly, but even the most sophisticated systems, such as Hisilicon CCTV VMS, can sometimes include features that hinder more than they help. A common problem is video overlays – elements such as timestamps, logos or graphics that clutter the video feed. For users who are serious about getting the most out of their Hisilicon CCTV system, Removing Video Overlay Hisilicon CCTV Vms Android is crucial to improving the clarity of their surveillance footage.
If you are using Hisilicon CCTV VMS on an Android device, this guide provides practical tips for Removing Video Overlay Hisilicon CCTV Vms Android quickly and effectively. Each method has been updated for 2024 to ensure you have the most accurate and up-to-date information. Let’s explore these proven techniques that will help you manage your video feeds more effectively.
Why Removing Video Overlay Hisilicon CCTV Vms Android Android Is Important
Removing Video Overlay Hisilicon CCTV Vms Android is not just about beauty – it’s about maximizing the functionality of your surveillance system. Overlays added by camera software may contain useful data, but are often unnecessary and obtrusive. In many professional settings, removing these overlays is essential to ensure:
- Improved visual clarity: Removing Video Overlay Hisilicon CCTV Vms Android ensures that every detail of the footage is visible without interference.
- Privacy compliance: In some jurisdictions, displaying certain types of information on a video feed may violate privacy laws or internal policies.
- Professional presentation: Removing Video Overlay Hisilicon CCTV Vms Android provides a clean video feed, which is especially important for presentations or reviews.
Now, let’s move on to five proven tips for achieving this goal.
Tip 1: Adjust Hisilicon CCTV VMS app settings on Android
The simplest way to remove the video overlay is to change the settings directly within the Hisilicon CCTV VMS Android app. This method is suitable for both beginners and advanced users.
Steps to access and change settings
- Open the Hisilicon CCTV VMS app: Launch the application on your Android device. To work smoothly, make sure the app is updated.
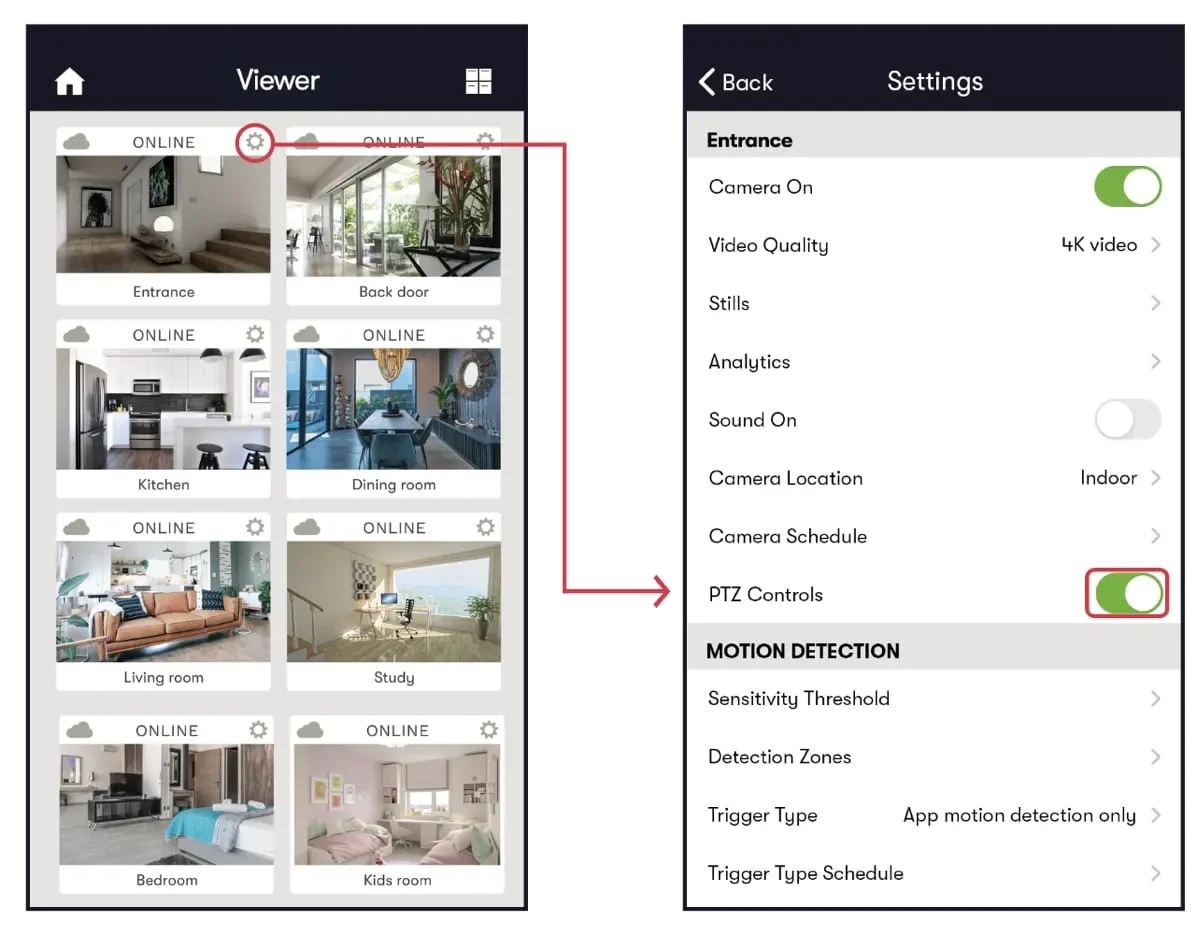
- Access the Settings menu: Look for the Settings icon, which is usually represented by a gear or wrench symbol. This icon is usually located in the upper-right or lower-right corner of the app’s main screen.
- Find overlay settings: Inside the Settings menu, look for sections such as “Overlay,” “OSD” (on-screen display), or “Video settings.” Different versions of the app may have these options under different labels, so look carefully.
- Disable unwanted overlays: Toggle off any overlays related to timestamps, logos, or other graphics to remove the Video Overlay Hisilicon CCTV VMS Android.
- Save changes: Make sure you save any modifications. Some applications may require a restart for the changes to take effect.
By following these steps, you can easily remove the Video Overlay Hisilicon CCTV VMS Android through the application settings. However, some overlays may be embedded at the firmware level, which requires further action.
Tip 2: Modify overlay settings in the camera firmware
If application-level changes are insufficient, you may need to remove the Video Overlay Hisilicon CCTV VMS Android by adjusting the camera’s firmware settings directly. This involves accessing the camera’s configuration via its IP address and changing the settings.
Steps to access camera firmware and modify settings
- Find the camera’s IP address: Use the Hisilicon CCTV VMS app to identify the IP address or use an IP scanner tool to find it on your local network.
- Access the camera’s web interface: Open your web browser and enter the camera’s IP address. A login screen should appear; use the default credentials provided in the camera manual.
- Find the OSD or display settings: Look for a setting called “OSD,” “display,” or “overlay.” These are usually found under the video or display settings.
- Disable overlay elements: To remove the video overlay Hisilicon CCTV VMS Android, turn off any options related to date, time, or logo overlays.
- Apply and save settings: Remember to save the changes and reboot the camera if necessary.
Benefits of firmware-level adjustments
By directly accessing and modifying firmware settings, you can ensure a more permanent solution to Removing Video Overlay Hisilicon CCTV Vms Android. This approach provides a clean feed directly from the hardware, eliminating overlays at the source.
Tip 3: Use a third-party video editing app on Android
If the overlays are already part of the recorded footage, you may need to use a third-party app to remove the video overlay Hisilicon CCTV VMS Android from your files.
Selecting and using a video editing app
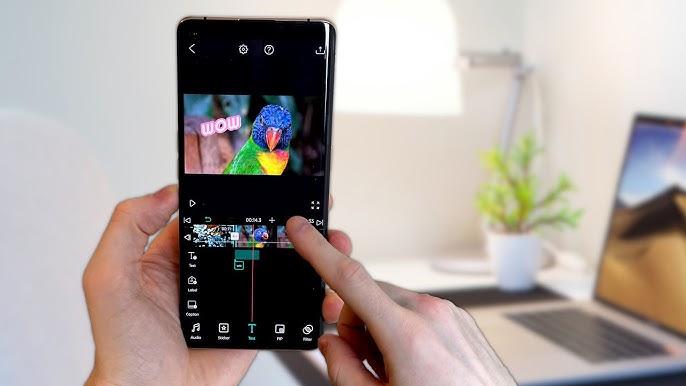
- Choose a reliable app: Apps like KineMaster, PowerDirector, or Adobe Premiere Rush are great options for editing. They offer various tools that can be used to remove the video overlay Hisilicon CCTV VMS Android.
- Import the footage: Open the app and load the video file containing the overlay.
- Crop the overlay: If the overlay is on the edges, use the crop tool to remove the video overlay Hisilicon CCTV VMS Android by cutting out the parts of the video that contain the overlay. This method works well when the overlay is on the edges, but it may result in a slightly less visible area.
- Blur or mask overlays: Use blurring or masking features to cover the overlays located in the middle of the frame. This technique allows you to remove the video overlay Hisilicon CCTV VMS Android while retaining most of the footage’s content.
- Export edited videos: Save your edited footage without the overlays.
Benefits of using editing apps
Using these tools is especially helpful for post-processing when you cannot control the overlays in the live feed. This is a practical way to remove the video overlay Hisilicon CCTV VMS Android from stored footage.
Tip 4: Edit the configuration files of Hisilicon CCTV VMS
For advanced users, editing the configuration files on your Android device can provide a straightforward way to remove the video overlay Hisilicon CCTV VMS Android.
Steps to safely edit configuration files
- Install file manager: Download a file manager like ES File Explorer that allows access to the app’s system files.
- Find configuration files: Go to the directory where the Hisilicon CCTV VMS app is stored, usually under “Android/data/[app folder].”
- Identify the correct configuration file: Look for files such as “config.xml” or “settings.ini” that control app settings.
- Edit overlay settings: Open the file using a text editor and find the parameters related to “overlay,” “OSD,” or “display.” Modify these parameters to remove the video overlay Hisilicon CCTV VMS Android by changing them from “1” (enabled) to “0” (disabled).
- Backup before editing: Always make a backup copy of the original file to avoid losing important data.
- Restart the app: After editing, restart the Hisilicon CCTV VMS app to apply the new settings.
Why editing configuration files can be effective
Editing configuration files allows for deeper customization, which provides a more optimized solution for Removing Video Overlay Hisilicon CCTV Vms Android. However, it requires caution, as incorrect changes can cause the app to malfunction.
Tip 5: Update or reinstall the Hisilicon CCTV VMS app
Keeping the Hisilicon CCTV VMS app updated is a key strategy for effectively Removing Video Overlay Hisilicon CCTV Vms Android. Updates can introduce new features, fix bugs, and provide better control over display settings.
Steps to ensure the app is updated
- Check for updates regularly: Visit the Google Play Store and search for “Hisilicon CCTV VMS”. If an update is available, install it immediately.
- Reinstall the app: If the overlay problem persists, uninstall the app and then reinstall it to reset all settings. This procedure can help Removing Video Overlay Hisilicon CCTV VMS Android by refreshing the app’s configuration.
- Check for changes: After updating or reinstalling, log back in and check if the overlay has been removed or if any new setting options are available.
Benefits of regular updates
- New features: Updates often provide new tools or options to Removing Video Overlay Hisilicon CCTV VMS Android.
- Bug fixes: Patches and fixes released in updates may directly resolve overlay issues.
- Increased compatibility: Regular updates ensure that your app remains compatible with the latest Android versions and devices.
Additional Strategies to Removing Video Overlay Hisilicon CCTV VMS Android
In addition to the primary methods mentioned above, here are some additional strategies you may find helpful:
1. Locate Custom Firmware or Alternative Software
If standard methods fail to Removing Video Overlay Hisilicon CCTV VMS Android, you may consider using custom firmware or alternative software that provides better control over the overlay.
- Custom Firmware: Some cameras support custom firmware developed by third parties, which may provide more flexibility in removing the overlay.
- Alternative VMS Solutions: Check out other VMS software options that may be compatible with Hisilicon cameras and provide more advanced control over the video overlay.
2. Seek help from Hisilicon support and user communities
For persistent issues, consulting Hisilicon’s support team or engaging with user communities can be invaluable for discovering new methods or firmware updates specifically designed to Removing Video Overlay Hisilicon CCTV VMS Android.
Frequently Asked Questions on Removing Video Overlay Hisilicon CCTV VMS Android
Q1. What types of overlays are controlled by the app vs. the camera firmware?
Overlays such as timestamps and camera logos are typically embedded by the camera’s firmware, while other graphics may be controlled by app settings. Both require different methods to Removing Video Overlay Hisilicon CCTV VMS Android.
Q2. Is it possible to remove all overlays without professional help?
Yes, using the tips in this guide, you can remove most overlays yourself. However, some overlays hardcoded into the camera firmware may require more special tools or assistance to Removing Video Overlay Hisilicon CCTV VMS Android.
Q3. Is there any risk in modifying configuration files or firmware settings?
Yes, modifying these settings incorrectly may cause malfunction or void your warranty. Always backup the original files before attempting to Removing Video Overlay Hisilicon CCTV VMS Android.
Q4. How do I recover from a damaged configuration file?
If something goes wrong while attempting to Removing Video Overlay Hisilicon CCTV VMS Android, restore the original settings from the backup copy to fix it or reinstall the app to reset it to default settings.
Q5. How often should I check for updates for the Hisilicon CCTV VMS app?
Check for updates regularly – at least monthly – so you stay up to date and maintain optimal settings for Removing Video Overlay Hisilicon CCTV VMS Android.
Conclusion
Removing Video Overlay Hisilicon CCTV VMS Android is a must for users who need unobstructed footage for professional or security purposes. Whether you choose to adjust settings within the app, modify the camera firmware, use third-party editing tools, tweak configuration files, or ensure your app is always up to date, each method offers a unique way to get a clear video feed. Using these strategies, you can effectively Removing Video Overlay Hisilicon CCTV VMS Android, ensuring your surveillance system works the way it’s intended without any distractions or visual clutter.
Choose the method that best suits your level of comfort and expertise, and don’t hesitate to seek additional help if needed. With the right approach, you’ll have a clear, clean view from your CCTV system in no time.